Getting to Know NodeMCU Board
It is an Open-source, Interactive, Programmable, Low cost, Simple, Smart, WI-FI-enabled board that may assist you to create IoT projects with ultra-fast prototyping.
The Development Kit supported ESP8266, integrates GPIO, PWM, IIC, 1-Wire, and ADC beat one board. Power your development within the fastest way with NodeMCU Firmware! .
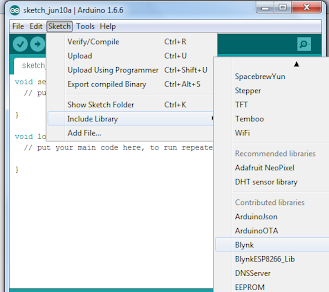
Blynk library link:https://github.com/blynkkk/blynk-library/releases
Getting to Know Blynk

Blynk may be a Platform with iOS and Android apps to regulate Arduino, Raspberry Pi and therefore the likes over the web .
Blynk was designed for the web of Things. It can control hardware remotely, it can display sensor data, it can store data, vizualize it and do many other cool things.
It's a digital dashboard where you'll build a graphic interface for your project by simply dragging and dropping widgets. It's really simple to line everything up and you will start tinkering in but 5 mins. Blynk isn't tied to some specific board or shield. Instead, it's supporting hardware of your choice. Whether your Arduino or Raspberry Pi is linked to the web over Wi-Fi, Ethernet or this new ESP8266 chip, Blynk will get you online and prepared for the web Of Your Things.
How does it work?
There are three major components within the platform:
Blynk Server - liable for all the communications between the smartphone and hardware. you'll use our Blynk Cloud or run your private Blynk server locally. It’s open-source, could easily handle thousands of devices, and may even be launched on a Raspberry Pi.
Setting Up Blynk With Arduino IDE
Board configuration?
Setting Up Blynk
1. First install the Blynk app from google play store then check-in
2. Click on New Project and you'll get a screen
*Enter the name of your project, I even have given it as iot led
*Then Select the Board as NODEMCU and then you'll recieve the authentication token no to your email id.
*And then Finally click on to the create button
3. Now you'll get your dashboard screen. Just click on the button "+" on the upper corner to feature widgets for your project.
4. During this project we add a button then configure its settings as Digital D4 pin.(Refer Screen Shots)
5. Its your choice you'll either have the button set as push type or as a switch
Circuit Diagram:

1. The connection is pretty simple just connect the Led to D4 pin via 330/220Ohm resistor. (refer to the diagram)
Uploading the Code

1.Connect your Esp8266 Wifi to your PC
2. Open Arduino IDE
3. Then attend File->Eamples->Blynk-Boards_Wifi->Esp8266Standalone
(Refer screen shot)
4. Select the right board (NodeMCU 1.0) and therefore the com port from the Tools Menu
Final Execution

1. After uploading the code
2. Open the Blynk app in the Phone
3. Let it connect to the internet
4. Then you would see your dashboard with a button
5. Press Play button on the top most right corner of the app
6. Then Alas!! Press the Button and you would see the LED Turn ON!!!:)


0 comments:
Post a Comment
Ask Something