Sunday, November 8, 2020

#1 Arduino detailed explanation and DigitalWrite Explained(Full tutorial)

 Hello, I'm Manikant Savadatti and today I will introduce you all to Arduino. This post is for absolute beginners. So in this post, you guys will learn the following things and will get answers to the following points.

1)What is Arduino and Arduino Ide?

2)How to use it?

3)Circuit connection?

4)How to blink a led using Arduino?


 1:What is Arduino and Arduino Ide

Whenever you ask what is Arduino the first answer what you get is it is a microcontroller.
Now, what is a microcontroller? It is like a mini-brain or a mini-computer. So we can use Arduino to control sensors, led's, motors etcc.. the same way the brain controls our hand's eyes legs etc...

For example: let us compare humans to the Arduino .human brain is like the Arduino, LED sensors motors, etc are like the eyes hands sense organs of a human body. If someone tells you to sit down your brain understands that language and sends a signal to sit down. In the same way, we tell the microcontroller to turn on the led in a particular language (c, c ++, python). Arduino understands this language like c,c++, python etcc.. and makes a led to turn on.

2)How to use it?

ARduino pinout


You guys can see the pinout diagram of the Arduino .In the above image, you guys can see black holes we use those wholes to connect sensors led's motors etc.All those holes are called as pins and those pins act as switches.All those switches are controllers using the Microcontroller. The black chip which you guys can see is the microcontroller and its name is Atmega328p.This microcontroller is attached to a breakout board which makes easy access of the pins . There are total 13 digital pins ,6 analog pins in Arduino.


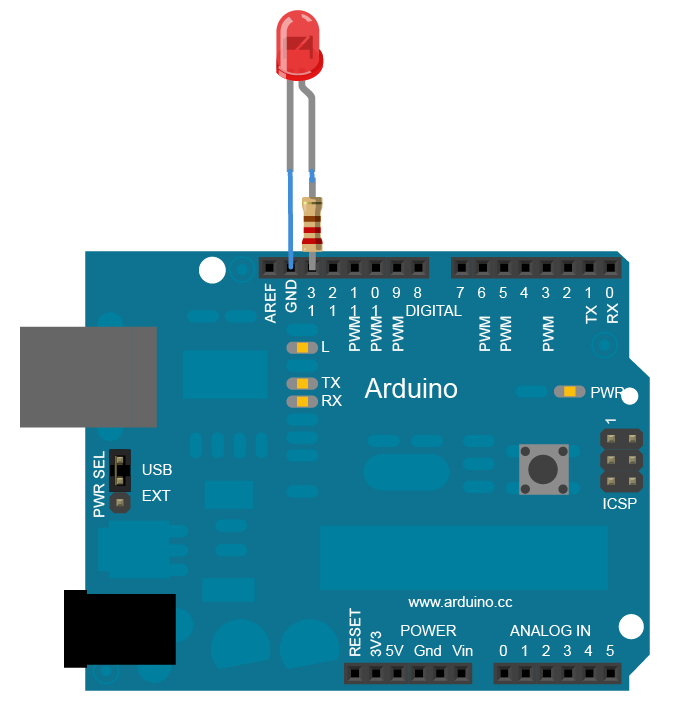
3)Circuit Connection:


Circuit diagram


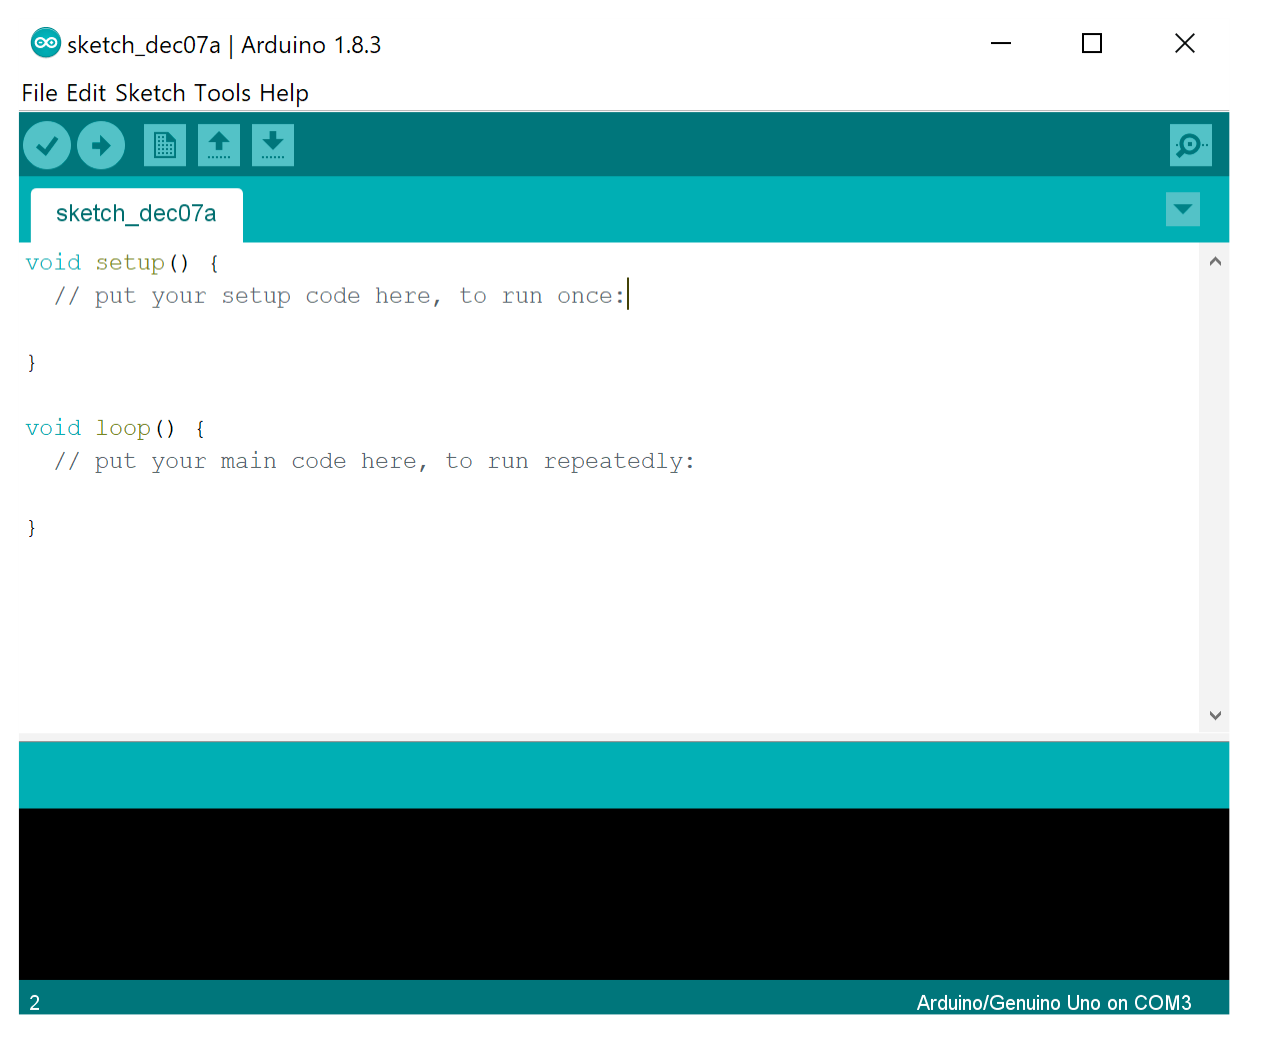
4)How to write your first program?

Arduino ide
This is the Arduino ide.You can download it from this link-Arduino ide

Code for led blink

This declares built-in led of Arduino as output

pinMode(LED_BUILTIN, OUTPUT);

In the void  loop, you can turn the LED on using this code:

digitalWrite(LED_BUILTIN, HIGH);

This supplies 5 volts to the LED anode. 

digitalWrite(LED_BUILTIN, LOW);

This makes the LED_BUILTIN pin back to 0 volts and turns the LED off. We need time  delay for a person to see the change in the state of led , so the delay(1000) commands tell the board to wait or  do nothing for 1000 milliseconds, or one second.


void setup() {  // initialize digital pin 13 as an output.
  pinMode(13, OUTPUT);
}

// the loop function runs continously over and over again.
void loop() {
  digitalWrite(13, HIGH);   // turn the LED on (HIGH is 5v)
  delay(1000);              // wait for a second
  digitalWrite(13, LOW);    // turn the LED off by making the voltage 0v
  delay(1000);              // wait for a second
}

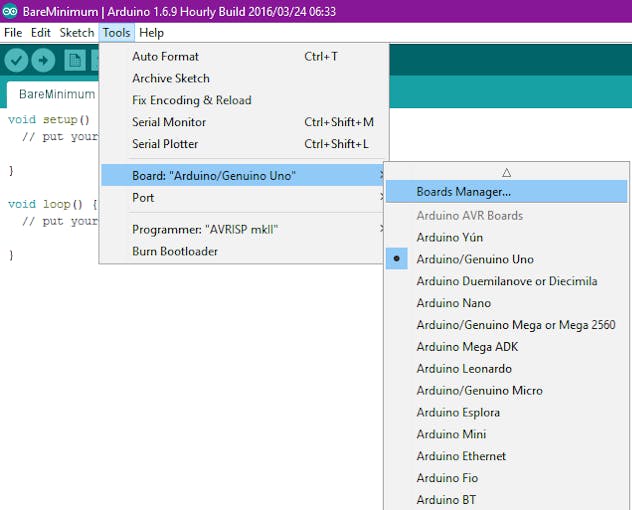
Paste this code in the Arduino ide and go to tools select Arduino Uno and select the right com port.

Upload

Click on upload and see led blinking in action..


Thank you, folks, see you in the next post.

Click here to learn to program esp8266-- Esp01 module

Click here to learn how to make vacuum cleaning robot--vacuum cleaner

Click here to learn how to make wifi controlled robot using nodemcu and blynk--wifi car


ManiTesla.tech

Author & Editor

Innovator and Robotics enthusisast intrested in building robots and web development

0 comments:

Post a Comment

Ask Something